So, you’re ready to dive into travel photography — camera in hand, passport ready, and excitement building. But with so much gear out there, it’s easy to feel overwhelmed. What do you really need to get started? What’s essential, and what can wait?
If you’re just beginning your travel photography journey, this guide will help you pack smart, avoid unnecessary expenses, and focus on the equipment that truly makes a difference.
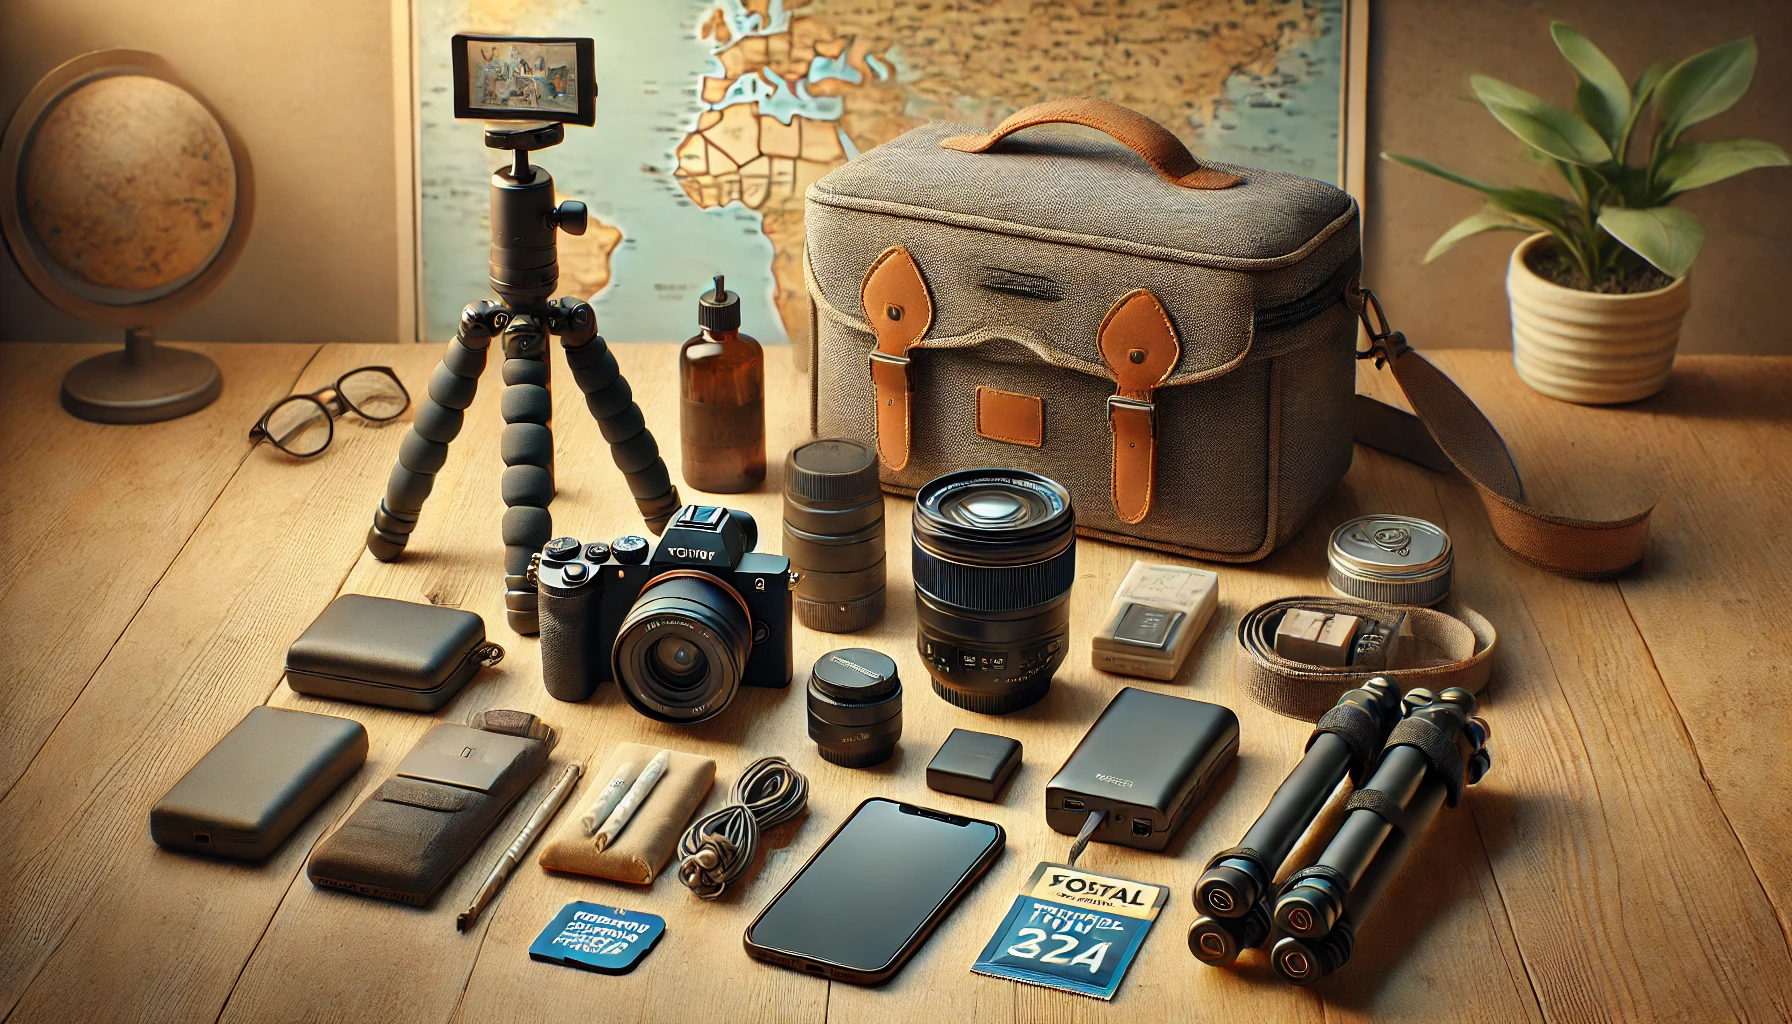
Start Simple: The Camera
You don’t need the most expensive camera to capture great photos. What matters is that you know how to use your gear and make the most of available light and composition.
Best beginner options:
- Mirrorless cameras (like the Sony a6000 or Canon EOS M50): Lightweight and versatile
- DSLRs (like Nikon D3500 or Canon Rebel T7): Great for learning manual settings
- High-end smartphones: iPhones or Google Pixels with advanced camera features
Stick with a camera that feels comfortable and intuitive. You’ll improve faster when you’re not fighting with your equipment.
Lenses: Start with Versatility
You don’t need a bag full of lenses. Start with one or two versatile options that cover a range of situations.
Great lens options for beginners:
- Kit lens (18–55mm): Most beginner cameras come with this — good for landscapes, portraits, and general travel shots
- 50mm prime lens (f/1.8): Affordable, lightweight, and perfect for portraits, low light, and bokeh
- Travel zoom lens (18–135mm or 24–105mm): Flexible for wide and close shots without switching lenses
Don’t worry about specialty lenses right away. Focus on mastering your basics.
A Lightweight Tripod: Stability Without the Bulk
Tripods are must-haves for:
- Long exposure shots
- Low light situations (like sunrise or blue hour)
- Self-portraits when traveling alone
- Timelapses or videos
Look for a compact, lightweight tripod that fits in your backpack. Brands like Manfrotto, Joby (GorillaPod), or Peak Design offer solid options for travel.
Extra Batteries and Memory Cards: Don’t Get Caught Unprepared
Imagine being at the top of a mountain with the perfect shot — and your battery dies. Or you run out of space mid-sunset. Don’t let it happen!
Bring:
- At least 2–3 extra batteries (charge overnight)
- High-speed SD cards (Class 10, UHS-I/UHS-II)
- A memory card case for organization and safety
For smartphone shooters, carry a portable power bank — especially if you’re using your phone for GPS and editing too.
Filters: Optional, but Handy
Filters can enhance your photos naturally, without editing. While not essential at the very beginning, they’re great to experiment with.
Two types to consider:
- Polarizing filter: Reduces glare, deepens skies, and boosts colors
- ND filter (Neutral Density): Lets you shoot long exposures in daylight (e.g., waterfalls, crowds)
Make sure the filters match your lens size!
Protective Gear: Keep Your Equipment Safe
Weather, dust, and bumps are part of the journey. Protect your gear so it lasts.
- Padded camera bag: Preferably one with compartments and theft-proof zippers
- Rain cover or plastic bag: Protect your camera during sudden rain
- Lens cleaning kit: A microfiber cloth, air blower, and cleaning solution
- Screen protectors: For both your phone and camera LCD screens
Treat your gear well — it’s your creative tool and travel companion.
Editing Apps or Software
Editing turns a good photo into a great one. You don’t need a laptop for every trip — your phone might be enough!
Options:
- Mobile: Lightroom Mobile, Snapseed, VSCO
- Desktop: Adobe Lightroom, Photoshop, or Capture One
- Cloud storage: Google Photos, iCloud, or Dropbox for safe backup
Learning basic editing will make a massive difference in your travel photography quality.
Optional Extras (Nice to Have Later)
Once you’ve built a foundation, you can explore extras like:
- Remote shutter release: For night shots or group photos
- External flash or LED light: For portraits or indoor shoots
- Drones: For aerial perspectives (just check local regulations)
- Action cameras (GoPro, Insta360): For underwater, sports, or POV videos
But remember — start small, and grow your gear as your skills and style evolve.
Focus on Skills, Not Just Gear
Many beginners fall into the trap of thinking that better gear means better photos. But the truth is: your eye, your timing, your light awareness, and your creativity matter more than anything in your backpack.
Learn the rules of photography. Break them when needed. Tell real stories. And always shoot with curiosity.
Frequently Asked Questions (FAQ)
1. I’m new to photography — should I start with a DSLR or a mirrorless camera?
For travel photography, mirrorless cameras are often the better choice for beginners. They’re lightweight, compact, and offer excellent image quality. However, entry-level DSLRs are also great for learning manual controls and are often more affordable.
2. Can I just use my smartphone instead of buying a camera?
Absolutely. Modern smartphones have powerful cameras and features like portrait mode, night mode, and even RAW shooting. If you’re just getting started, learning to compose and edit great photos with your phone is a solid first step.
3. Is a tripod really necessary for beginners?
It depends on your style, but a small, travel-friendly tripod is highly recommended — especially for low-light photography, self-portraits, and long exposure shots. It gives you more flexibility and creative control.
4. How many memory cards do I need for a trip?
Bring at least two high-speed memory cards (32GB or more). It’s also smart to rotate or back them up regularly so you don’t lose all your photos if one card fails or gets lost.
5. Do I need to carry multiple lenses?
Not at the beginning. A kit lens (like 18–55mm) is versatile and great for landscapes and everyday scenes. You might add a 50mm prime later for portraits or low-light shots, but one good lens is enough to start.