Timing is everything in photography — especially when you’re trying to capture the natural beauty of a travel destination. You could be standing in front of the most stunning landscape in the world, but if the light isn’t right, the magic just won’t translate to the photo. That’s why understanding the best times of day to shoot landscapes is one of the most important skills for any travel photographer.
Let’s explore how different times of day affect your photos — and how to make the most of each one.
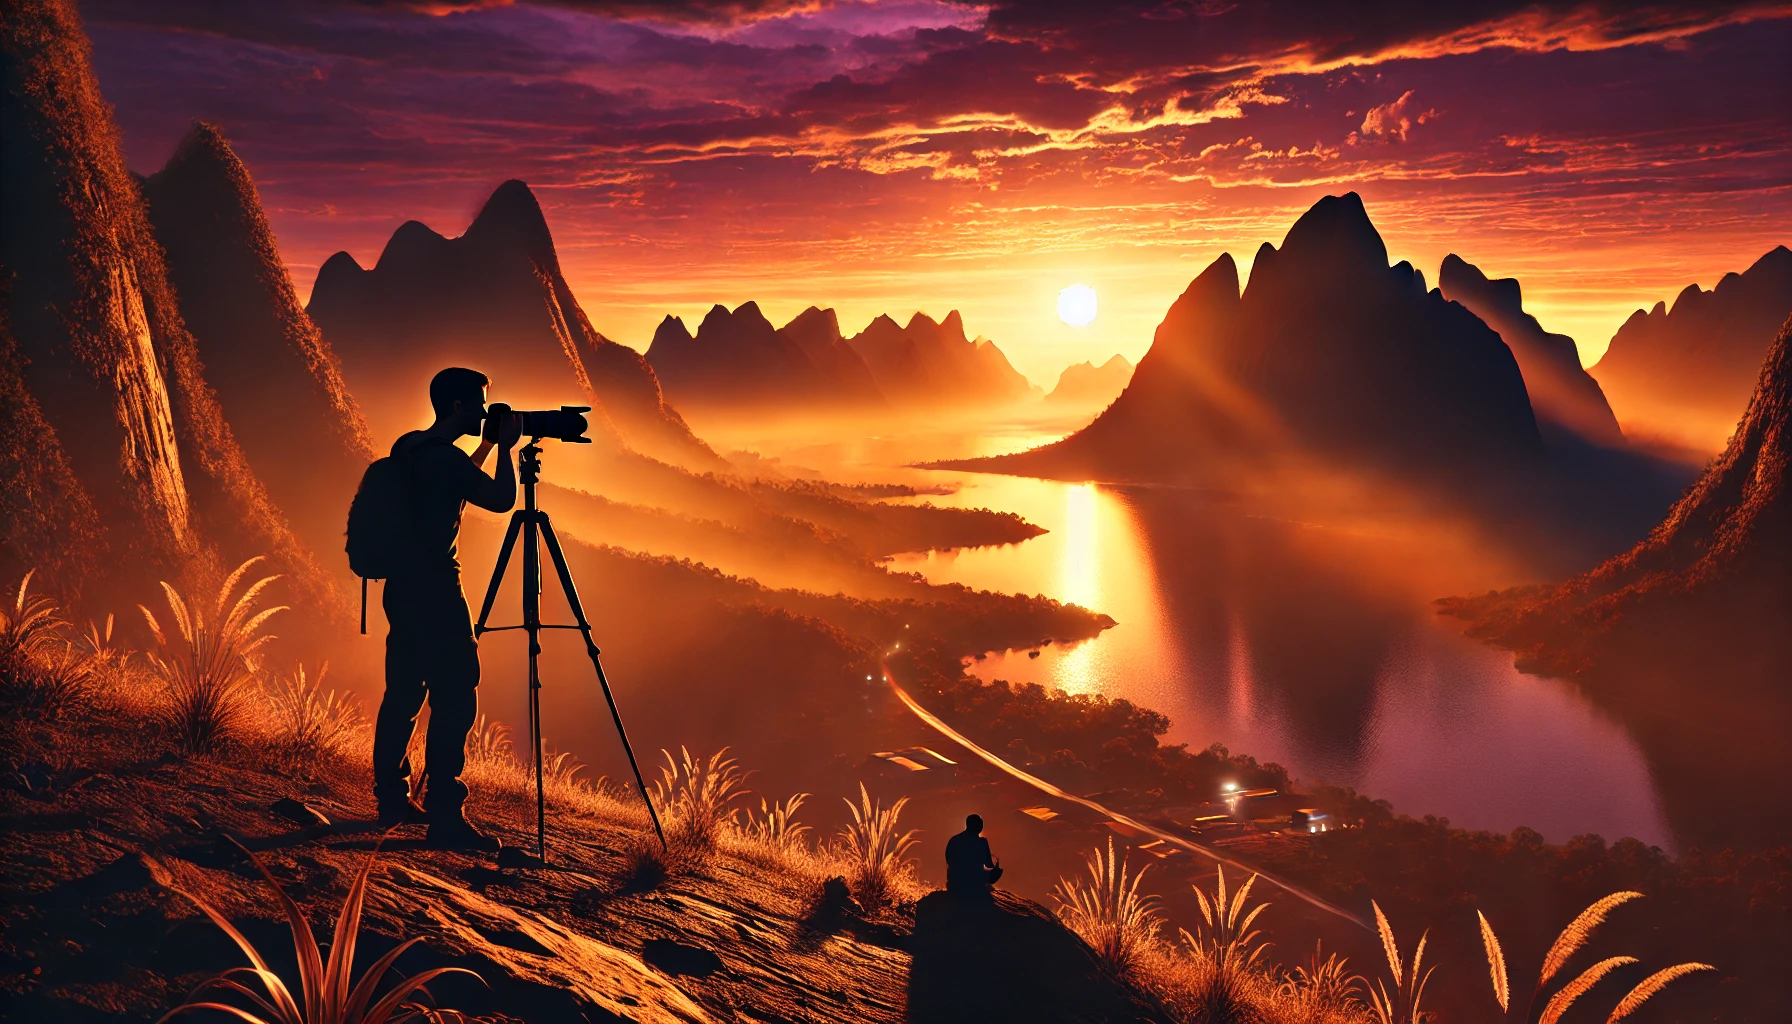
Golden Hour: The Photographer’s Dream
Golden hour is the most loved time of day for landscape photography — and for good reason. It refers to the period shortly after sunrise and just before sunset when the sunlight is soft, warm, and diffused.
Why it’s amazing:
- Soft shadows that add depth without being harsh
- Warm, golden tones that enhance colors naturally
- Balanced lighting for both sky and ground
- Magical atmosphere that adds emotion and romance
Whether you’re photographing mountains, beaches, forests, or cities — golden hour is the time to go all in.
Pro tip:
Arrive early and stay a bit after. The light changes quickly during golden hour — and sometimes the best moments are right before or after the “main” shot.
Blue Hour: The Underrated Gem
Blue hour occurs before sunrise and after sunset, when the sky turns deep blue and the ambient light is cool and moody. It usually lasts 20 to 40 minutes depending on the location and season.
Why it’s amazing:
- Cool tones that feel calm and cinematic
- Balanced light for cityscapes — especially with artificial lights on
- No harsh shadows — perfect for reflective surfaces like lakes or wet streets
- Gorgeous silhouettes against the sky
If you want a dreamy, moody vibe, blue hour is your moment.
Pro tip:
Use a tripod, since light levels are lower and longer exposures may be necessary. Experiment with reflections, movement, and long shutter speeds.
Sunrise: Peaceful and Rewarding
Waking up before the world does has its benefits. Sunrise is often overlooked because it’s early, but it offers some of the best lighting and fewest crowds.
Why it’s amazing:
- Golden hour light, but often with fog or mist for added atmosphere
- Empty streets and landscapes — perfect for uninterrupted shots
- Wildlife activity in natural settings
- Dew and natural textures that disappear later in the day
Pro tip:
Scout your location the day before so you know where the sun will rise. Apps like PhotoPills or The Photographer’s Ephemeris can help you plan perfectly.
Midday: Tricky but Not Useless
Midday is often the least favorable time for landscape photography because of the high sun, harsh light, and flat colors. But if you know how to use it right, you can still make it work.
Why it’s challenging:
- Strong shadows that cut across faces and terrain
- Washed out colors in bright conditions
- Lack of mood or dimension
When midday works:
- Cloudy or overcast days — the clouds act as a natural diffuser
- High-altitude locations where light behaves differently
- Desert scenes or open plains with bold shadows
- Using filters (ND or polarizers) to reduce harsh effects
Pro tip:
Look for contrast and geometry — shadows on buildings, interesting textures, or vibrant elements that can stand out even under harsh light.
Sunset: Drama and Color
Sunset is one of the most popular times for landscape photography, offering incredible dynamic range, intense colors, and dramatic skies.
Why it’s amazing:
- Vivid skies with pinks, purples, oranges, and reds
- Long shadows that enhance depth
- Silhouettes become more expressive
- Emotional tone that adds feeling to the photo
Pro tip:
Don’t pack up right after the sun disappears — the afterglow can be even more beautiful. Stick around and observe how the colors shift and deepen.
Night: Creative Possibilities
Landscape photography doesn’t end when the sun goes down. Nighttime offers a chance to get truly creative, especially with the right equipment.
What makes it special:
- Stars and the Milky Way in remote locations
- City lights that create a unique urban landscape
- Reflections and long exposures
- Light trails from cars, boats, or stars
What you’ll need:
- A tripod to keep the camera steady
- A remote shutter or timer to avoid camera shake
- Manual settings for full control over ISO, shutter speed, and aperture
- A wide lens with low aperture (f/2.8 or lower) for astrophotography
Pro tip:
Choose places with low light pollution for star photography, or use apps like Dark Sky Finder to scout ideal locations.
How to Choose the Best Time for Your Scene
The best time of day depends on what story you’re trying to tell. Here’s a quick guide:
| Scene Type | Best Time of Day |
|---|---|
| Cityscapes | Blue hour / Night |
| Beaches | Golden hour / Sunrise |
| Mountains | Sunrise / Sunset |
| Forests | Early morning (with mist) |
| Deserts | Sunset / Midday (for harsh contrast) |
| Lakes or Reflections | Golden hour / Blue hour |
| Urban Architecture | Morning (for clean shadows) |
Always consider the direction of the sun, the weather, and your location’s unique features.
The Right Light Can Transform Everything
Great landscape photography is more than pointing your camera at something pretty — it’s about timing, patience, and light. By planning your shoots around the best times of day, you give your photos a fighting chance to stand out, evoke emotion, and leave a lasting impression.
The landscape won’t change — but the light will. And that’s what makes the difference between a snapshot and a masterpiece.
Frequently Asked Questions (FAQ)
1. Do I need a professional camera to make my travel photos stand out on social media?
No! While a DSLR or mirrorless camera can improve image quality, many smartphones today offer powerful cameras that are more than enough. What really makes your photos stand out is composition, lighting, and editing — not just the gear.
2. What are the best social media platforms for sharing travel photography?
Instagram is still the top platform for visual storytelling, but Pinterest, Facebook, and even TikTok (via slideshows or short videos) are great for reaching wider audiences. You can also use platforms like 500px or Unsplash for exposure among photography lovers.
3. Should I edit my photos before posting them?
Yes — light editing can dramatically enhance your photos. Adjustments to brightness, contrast, saturation, and sharpness can make an image pop without losing its natural look. Use apps like Lightroom Mobile, Snapseed, or VSCO for high-quality edits.
4. How can I develop a consistent aesthetic or feed?
Choose a specific editing style (warm, cool, vintage, natural) and stick with it. Using presets or filters consistently helps maintain a cohesive look. Also, try to align your composition style, tones, and themes for a recognizable personal brand.
5. How important are captions and hashtags for visibility?
Very! Captions help add context and personality to your posts, while hashtags increase discoverability. Use a mix of popular and niche hashtags related to your location, travel style, and photography genre to reach the right audience.
6. Is it okay to schedule my posts?
Absolutely. Using tools like Buffer, Later, or Meta Business Suite helps you stay consistent and post during optimal engagement times — even when you’re off the grid.