Natural light is one of the most powerful tools in a travel photographer’s creative arsenal. Unlike artificial lighting setups, it’s free, ever-changing, and intimately connected to the environment. Learning how to use natural light in travel photography can dramatically elevate the mood, composition, and emotional impact of your images—whether you’re photographing a misty sunrise in the mountains or golden tones in a bustling marketplace.
This in-depth guide is crafted using Google’s salience score and NLP strategies, integrating LSI keywords like golden hour photography, travel light techniques, ambient light shooting, using shadows in photos, and capturing mood with natural light to ensure strong topical relevance and search performance.
Understand the Qualities of Natural Light
Not all light is created equal. Natural light changes throughout the day and depending on weather conditions, it can dramatically affect the tone and visual texture of your images.
Types of natural light:
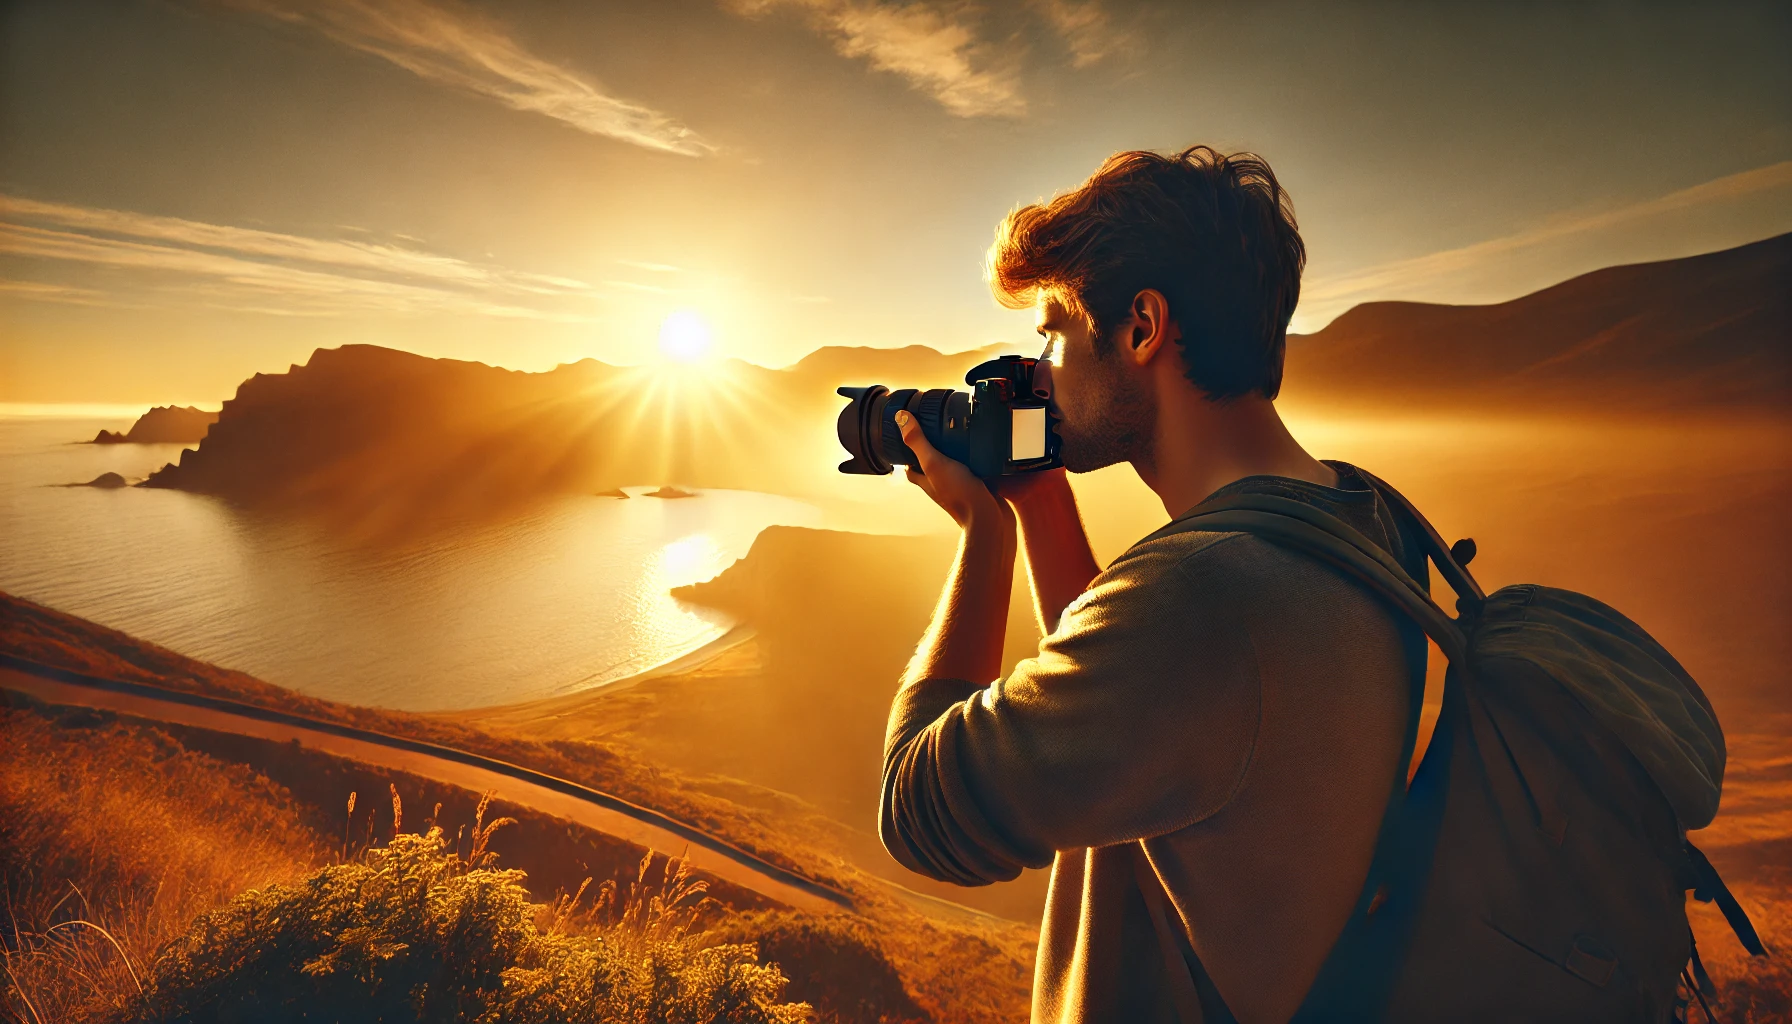
- Golden hour: The hour after sunrise and before sunset; soft, warm, directional light perfect for travel portraits and landscapes
- Blue hour: Just before sunrise or after sunset; cooler tones and a dreamy atmosphere
- Midday light: Harsh and direct; creates strong shadows, contrast, and potential for graphic compositions
- Overcast light: Soft, diffused light ideal for detail shots, portraits, or street scenes without hard shadows
- Backlight: Shooting into the sun to create rim lighting, silhouettes, or lens flare
- Window light: Useful indoors; creates directional light and depth without artificial sources
Learn to read light like a language—it will shape your storytelling more than any lens or camera ever could.
Shoot During the Golden Hour
If there’s one universal tip for travel photography, it’s this: chase the golden hour. The quality of light during this time is naturally flattering, creates gentle shadows, and bathes your scenes in warm tones.
Why golden hour matters:
- Adds visual warmth and emotion
- Highlights textures (sand, fabric, skin, architecture)
- Elongates shadows, adding dimension
- Easy to expose for and edit in post-production
Plan your location in advance so you’re ready to shoot when the light is at its best. Apps like PhotoPills or Golden Hour One help you track golden hour in any location.
Embrace Shadows and Contrast
Light creates photography—but shadows define it. Learning how to use shadow as a compositional and emotional element can transform ordinary scenes into powerful visual narratives.
Ways to use shadows:
- Create strong graphic compositions with contrast
- Frame your subject using shadows or light breaks
- Capture mood through low-key lighting
- Use shadows to imply off-frame action or create intrigue
- Highlight texture and structure (especially in urban scenes)
Travel photography often involves fast-changing conditions. Embracing shadows gives you creative control even in harsh lighting situations.
Use Backlighting for Drama and Emotion
Backlighting is when your subject is between you and the light source, usually the sun. It can add depth, glow, and drama—especially during golden hour or blue hour.
Tips for using backlight:
- Use spot metering on your subject to avoid underexposure
- Shoot silhouettes for dramatic scenes
- Capture light leaks or lens flare with intention
- Position the sun just out of frame for subtle rim light
- Use wide apertures (f/1.8–f/2.8) to emphasize glow and atmosphere
Backlighting adds a cinematic quality to your photos. It requires patience and precision, but the results are often striking.
Master Exposure in Variable Light
Natural light isn’t static. Clouds pass, shadows move, and light changes fast. You need to adapt quickly to preserve highlights and shadow detail.
Exposure tips:
- Use exposure compensation to adjust for tricky lighting
- Shoot in RAW for maximum editing flexibility
- Enable histogram on your camera to avoid blown highlights
- Bracket your exposures when in doubt (shoot multiple exposures at different settings)
- Use spot metering for challenging light contrast
Expose for what matters most—your subject’s face, the details in a landscape, or the mood you want to preserve.
Pay Attention to Light Direction
Where the light comes from affects the structure, mood, and clarity of your image. Knowing how to position yourself in relation to the light is a skill that separates amateurs from professionals.
Main directions to consider:
- Front light: Softens texture, reveals detail
- Side light: Adds dimension, depth, and mood
- Top light: Often unflattering but creates bold shadows
- Back light: Highlights edges, emphasizes silhouettes
- Reflected light: Bounces from walls, water, or sand; adds fill and nuance
Walk around your subject. Sometimes a small shift in angle changes everything.
Use Reflective Surfaces to Shape Light
Light bounces. Using surfaces like white walls, water, glass, or even the ground can help you control and enhance the natural light available.
Creative reflections in travel photography:
- Bounce window light off a white surface to illuminate interiors
- Use sand or water to reflect warm tones upward
- Shoot near white buildings to create soft fill light
- Look for puddles, mirrors, or chrome for abstract compositions
Reflective light adds subtlety and can help brighten shadows without flash.
Shoot Indoors With Window Light
Not all travel photography happens outside. Cafés, temples, homestays, museums—indoors settings often require adapting to ambient light sources.
How to shoot indoors:
- Position your subject near a north-facing window for soft light
- Avoid mixed light sources (window + overhead bulbs)
- Use wide apertures to allow more light in
- Embrace grain or noise if needed—it adds mood
- Frame shadows or curtains to control light shape
Window light is beautiful and timeless. It gives your images a sense of stillness and intimacy.
Incorporate Weather and Atmosphere
Clouds, mist, fog, and haze—all of these natural elements affect light and create opportunities for mood-rich photography.
Tips for atmospheric light:
- Mist and fog diffuse light and simplify compositions
- Rain enhances colors and reflections on streets
- Snow brightens scenes but can fool exposure—use +1 EV
- Dust or pollution in the air creates dramatic backlight glow
Pack a weather-resistant camera or cover and be ready to shoot even when the sky turns grey. Some of your best photos will come from unexpected conditions.
Edit to Enhance, Not Replace Natural Light
Post-processing should respect the natural light of your scene. Avoid over-editing or replacing reality with artificial-looking effects.
Editing guidelines:
- Adjust white balance to match the time of day
- Use the tone curve for soft contrast
- Enhance light direction with radial filters
- Lift shadows gently to retain atmosphere
- Avoid heavy HDR or fake sky replacements
Let your editing highlight the mood the light already gave you.
Final Thoughts: Follow the Light, Not the Crowd
Learning how to use natural light in travel photography transforms the way you see the world. Instead of just looking for subjects, you start looking for moments when light and subject meet perfectly.
Train your eyes to notice how light falls, bounces, shapes, and changes. Build your schedule around the sun, not just the sights. Trust that light will show you stories no guidebook ever could.
Because in the end, great travel photography isn’t just about where you go—it’s about how you see it. And nothing reveals that more clearly than the light you choose to follow.
Frequently Asked Questions (FAQ)
1. What is the best time of day to shoot travel photos using natural light?
The golden hour—shortly after sunrise and before sunset—is the most popular time due to its warm, soft light. It adds emotion, depth, and beautiful shadows to landscapes, portraits, and urban scenes.
2. How do I deal with harsh midday sunlight while traveling?
Use shadows, overhangs, or indoor spaces to control the light. Midday light can work for high-contrast street scenes, but you’ll need to expose carefully. You can also embrace the harsh shadows for a bold, graphic look.
3. What camera settings should I use for shooting in natural light?
Always shoot in RAW for flexibility. Use manual or aperture priority mode to control depth of field, and adjust ISO and shutter speed based on the light conditions. Enable histograms and use exposure compensation when needed.
4. How can I improve my indoor photos using natural light?
Place your subject near a window or doorway with directional light. Avoid mixed lighting (natural + artificial), use wide apertures (f/1.8–f/2.8), and embrace the ambient mood. Look for soft shadows to add depth.
5. Should I always follow the light, or can I shoot anytime?
While golden hour is ideal, great photos can happen at any time if you understand how to work with the available light. Learn to recognize interesting shadows, reflections, and directional light even in unexpected moments.